Hello, I’m Tomotaka Kizawa as AWS Ambassador and SORACOM MVC award winner.
Then, I would like to introduce an interesting use case using IoT buttons.
Japanese version is here. (use Twilio service in this case)
Background
There are boring meetings, right?
I was thinking about how I could escape from such a meeting.
At that time, I found this article.

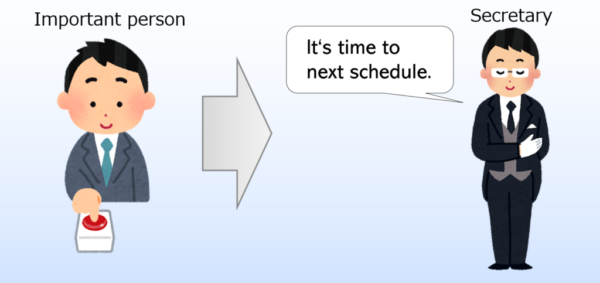
Mr. Trudeau,Canadian prime minister has escape meeting button.
I want this one!
It’s structure is below.cannot be imitated by common people.
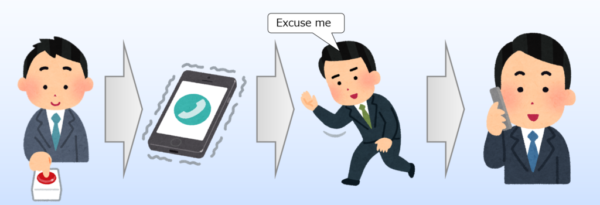
So I thought I could escape from the meeting by getting a call by pressing a button.
Architecture
This architecture is very simple.
Invoke a Lambda function by pressing a button and make a call using Amazon Connect.
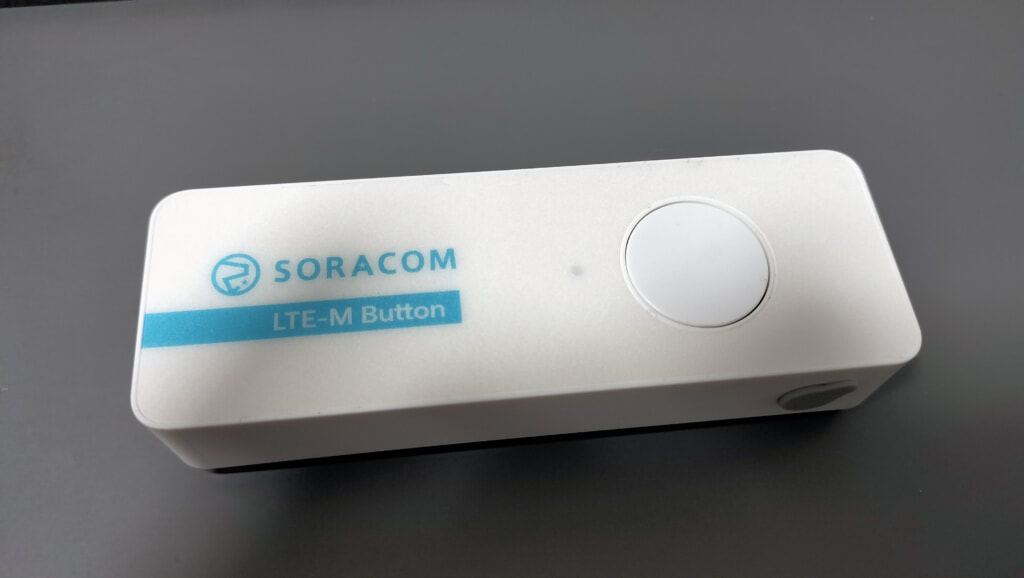
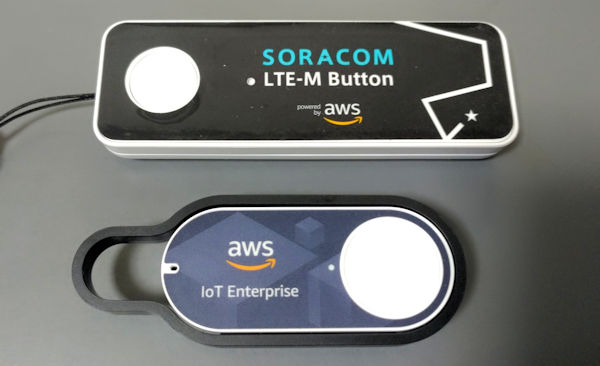
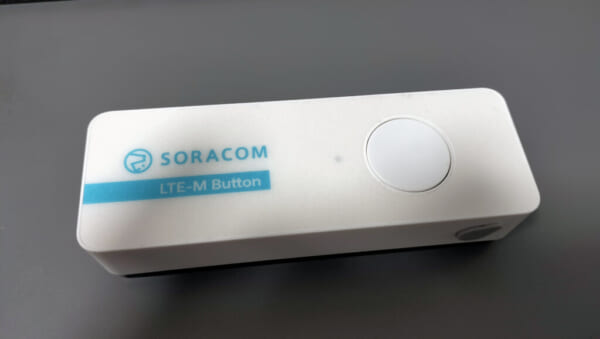
I use Soracom LTE-M Button for IoT Button in this case.
This button has LTE-M connectivity and can be used in over 150 countries around the world.
You can buy this button in Mouser site.
There are three button press patterns: single, double, and long.
Setup steps
Setup steps is below.
- Setup Soracom LTE-M Button
- Get a phone number in Amazon Connect and make a call flow.
- Make a lambda function to make a call.
- Setup SORACOM Funk (with serring of invoke lambda function)
Soracom LTE-M Button
First, create a SORACOM user account in SORACOM user console.
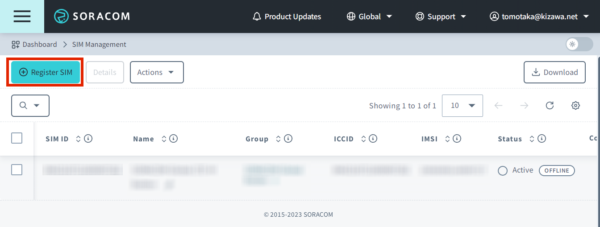
Next, register your button in the console.
(Menu – SORACOM AIR FOR CELLULAR – SIM Management)
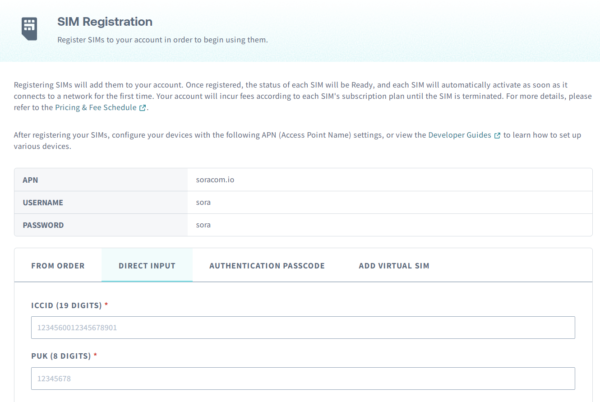
Please push the “Registar SIM” button.
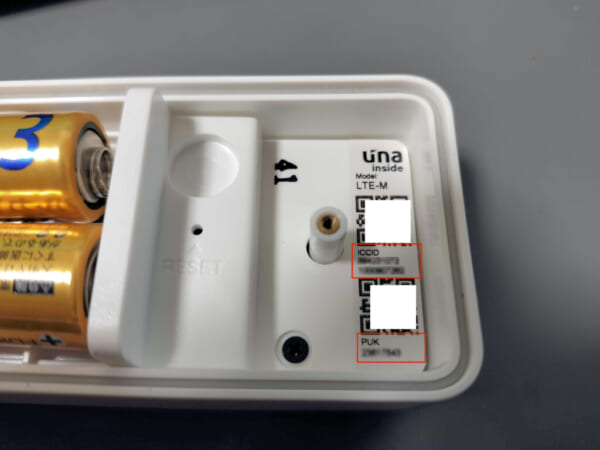
Input ICCID and PUK information.
The input information for ICCID and PUK is written inside when you open the cover on the back of the button.
Amazon Connect
Get a phone number in Amazon Connect and make a call flow.
Setup Amazon Connect Instance
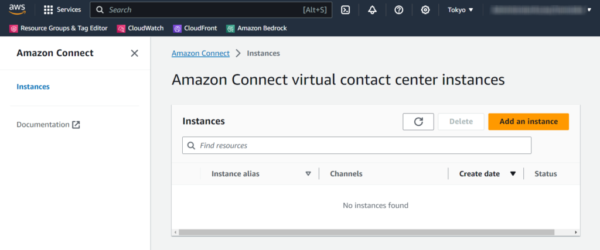
First, create an instance by following the steps below.
In AWS User Console, please push “Add an instance” button.
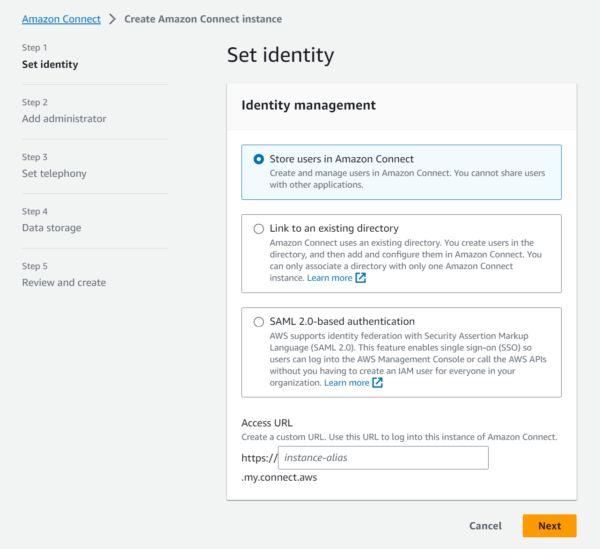
In this case, It is no problem that Identity model as “Store uses in Amazon Connect”.
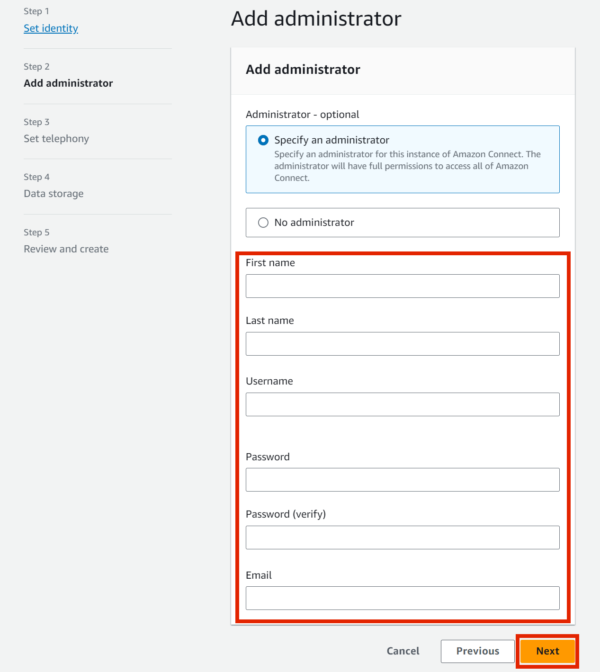
Please input the administrator user information.
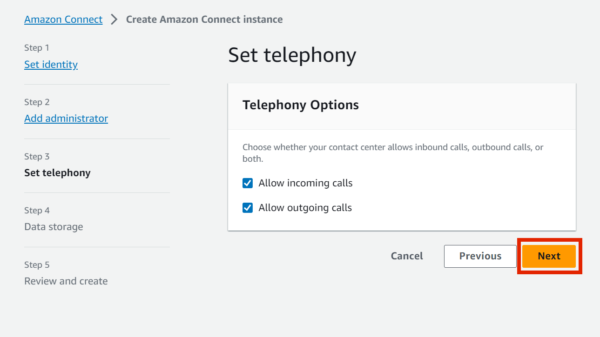
Settings for incoming and outgoing calls on this instance.
Check both and there is no problem.
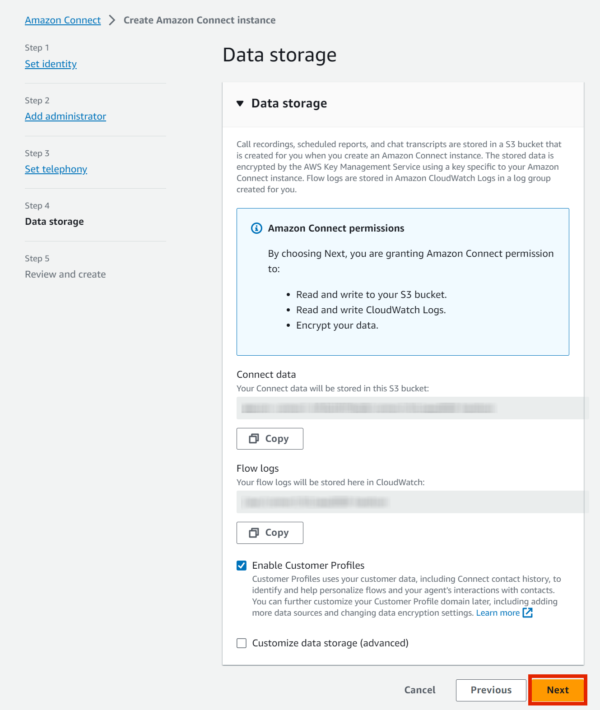
Setting for data storage on this instance.
There is no problem with the default settings.
Check the settings and create the instance.
If settings have been completed successfully, please push the “Get started” button.
The Amazon Connect console will open in a separate tab.
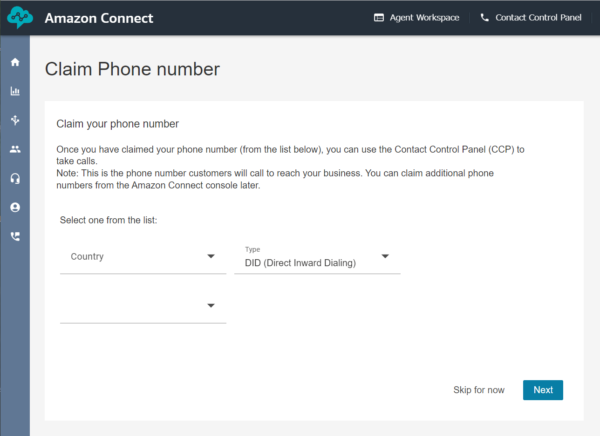
Get a phone number
Select phone number’s country and phone number type (DID or Toll free dial)
Select from the displayed phone number suggestions.
Create a call flow
Next, Make a call flow of outbound call.
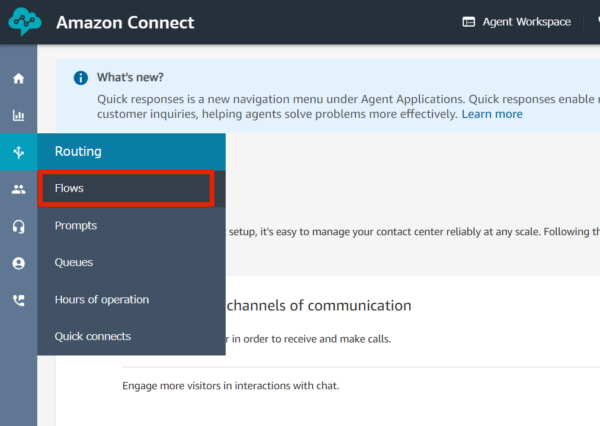
Select “Routing”-“Flows” from the sidebar on the left.
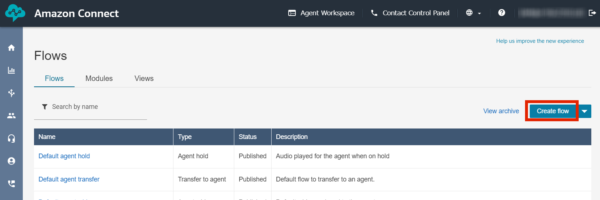
Create a new call flow. Click “Create New”.
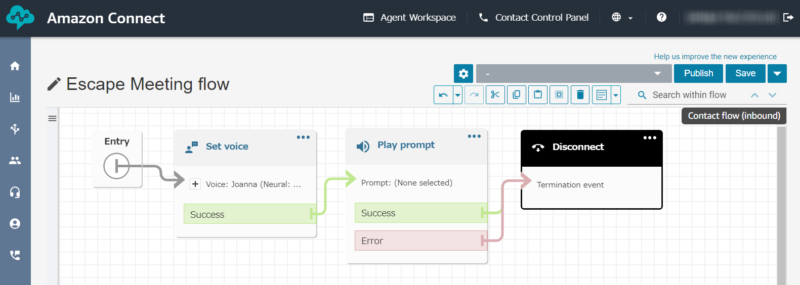
This time, you create a flow like the one below.
Create a flow like the one below by combining blocks.
- Set Voice
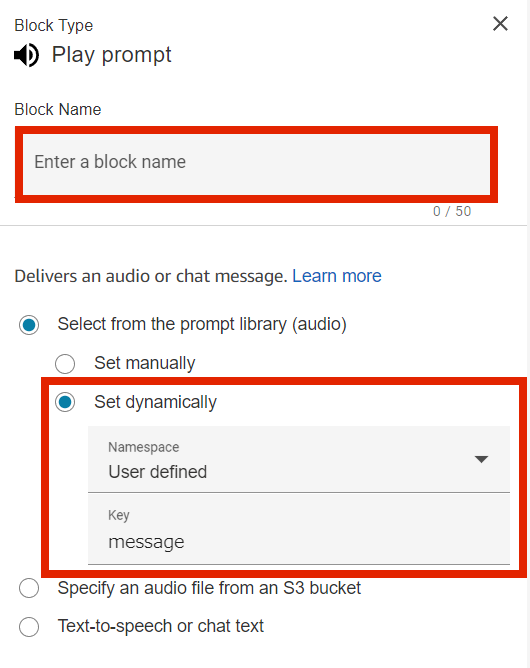
Specify the voice of your choice. - Play prompt
Specify the voice to speak.
This time, you will configure the Lambda function to utter the specified voice as follows.
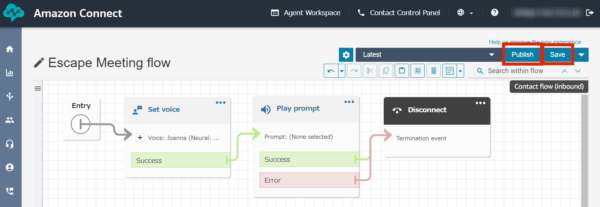
You has complete settings, click “Save” > “Publish”.
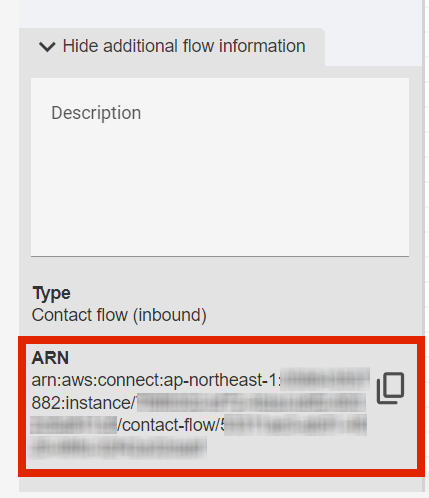
After publishing is complete, check the ARN of the call flow.
This will be used later for Lambda configuration.
Lambda function
Create a Lambda function to invoke the callflow.
Create IAM Pollicy and Role
First, create an IAM Role to be used for the Lambda function.
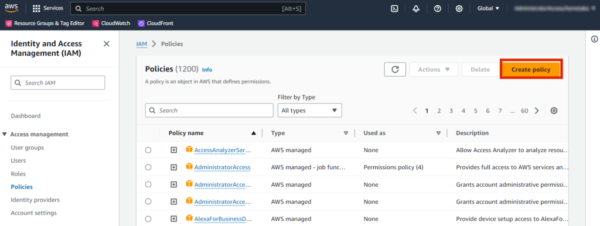
In IAM Policy page, Click “Create Policy” Button.
The IAM Policy is below.
{
    "Version": "2012-10-17",
    "Statement": [
        {
            "Effect": "Allow",
            "Action": "connect:StartOutboundVoiceContact",
            "Resource": "*"
        }
    ]
}
Next, Create an IAM Role with this IAM Policy attached.
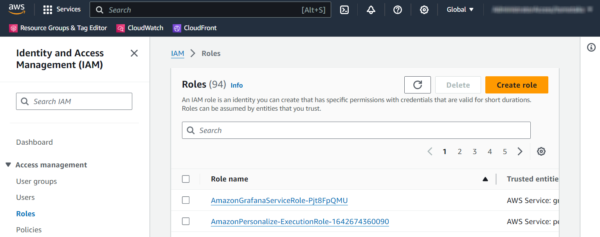
In IAM role page, Click “Create role” Button.
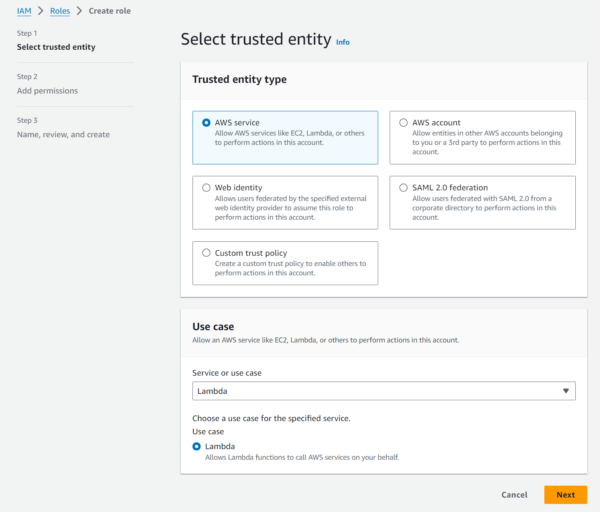
Please specify AWS service and Lambda as Trusted entity type.
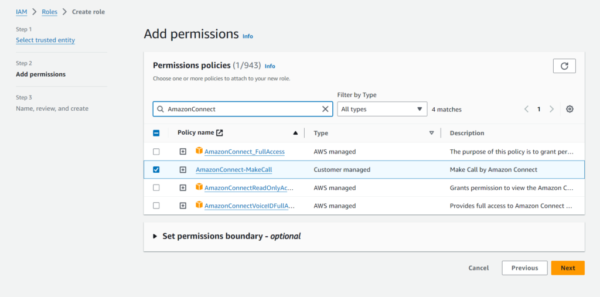
Set the IAM Policy you created earlier.
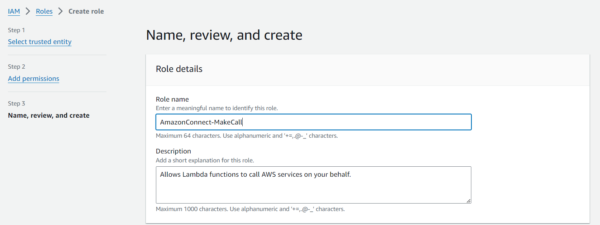
Pleast input IAM role’s name.
The creation of the IAM Role has been completed.
make Lamnda Function
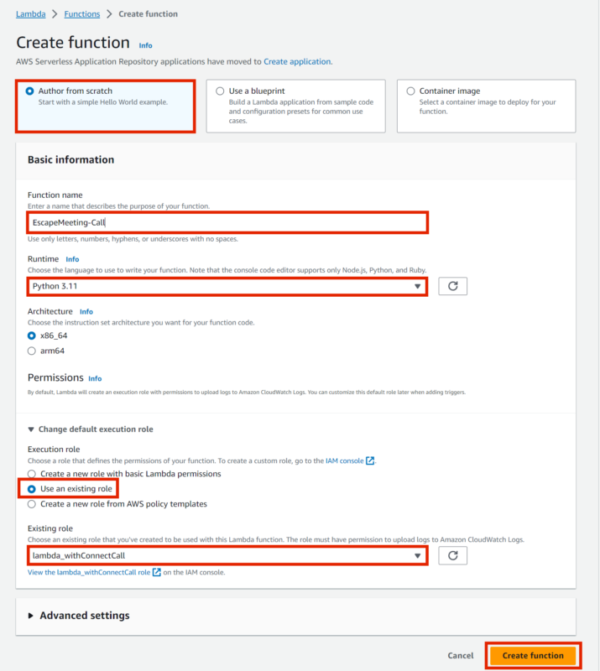
Let’s start creating the Lambda function.
Set as follows. Set the IAM role you created earlier.
The function program is below.(Python)
import json
import boto3
import os

connect = boto3.client('connect')
FlowID = os.environ['FlowID']
InstanceID = os.environ['InstanceID']
MobilePhoneNumber = os.environ['MobilePhoneNumber']
ConnectPhoneNumber = os.environ['ConnectPhoneNumber']

def lambda_handler(event, context):
    # Get click type from event.(these values was set by SORACOM.)
    clickType = event['detect_type']

    # Set message.
    if clickType == "Single short click":
        message = os.environ['message_single']
    elif clickType == "Double short click":
        message = os.environ['message_double']
    elif clickType == "Single long click":
        message = os.environ['message_long']
    else:
        message = 'Error'

    # Call to your mobile phone. See your connect flow.
    response = connect.start_outbound_voice_contact(
        DestinationPhoneNumber = os.environ['MobilePhoneNumber'],
        ContactFlowId = os.environ['FlowID'],
        InstanceId = os.environ['InstanceID'],
        SourcePhoneNumber = os.environ['ConnectPhoneNumber'],
        Attributes = {
            'message': message
        }
    )

    return {
        'statusCode': 200,
        'body': json.dumps(response)
    }
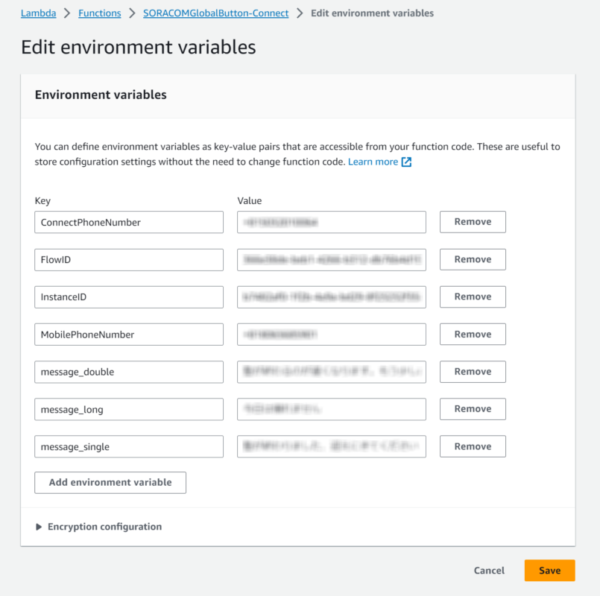
After lambda function created, Specify environment variables as below.
- ConnectPhoneNumber
Specify the phone number you created with Amazon Connect. - FlowID
The Amazon Connect’s FlowID (String after “/contact-flow/” in ARN) - InstanceID
The Amazon Connect’s InstanceID (String between “/instance/” and “/contact-flow/” in ARN) - MobilePhoneNumber
The phone number call to. - message_double
The voice you want to make when double-clicked - message_long
The voice you want to make when long-clicked - message_single
The voice you want to make when single-clicked
After lambda fucnctions deployed check the ARN of the function.
This will be used later for SORACOM Funk configuration.
SORACOM Funk
SORACOM Funk service can directly call FaaS functions on public cloud.
When connecting to AWS Lambda, you can connect via IAM assume role because the SORACOM system is built on AWS.
make IAM Pollicy and Role
Create an IAM role to call functions with SORACOM Funk.
First, create IAM policy as below.
{
    "Version": "2012-10-17",
    "Statement": [
        {
            "Sid": "AllowAuroraToExampleFunction",
            "Effect": "Allow",
            "Action": "lambda:InvokeFunction",
            "Resource": "arn:aws:lambda:ap-northeast-1:123456789012:function:SORACOMButton-Escape2"
        }
    ]
}
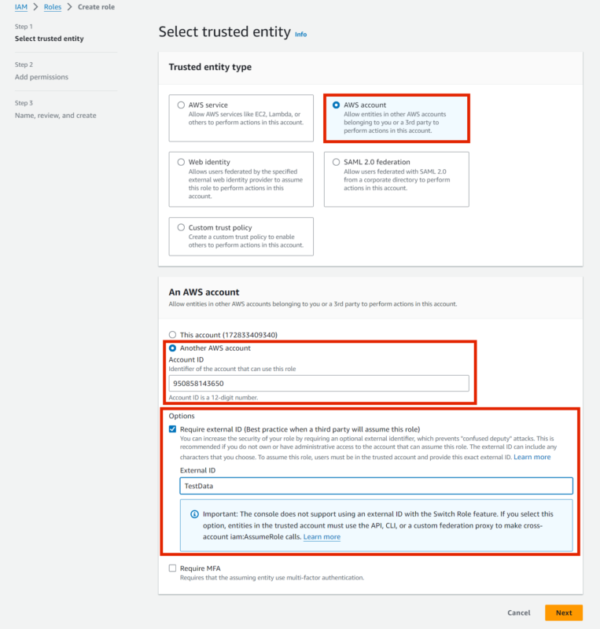
Next, create a IAM role using the created IAM policy.
Settings An AWS account is “another AWS account” 950858143650, This is SORACOM Carrier network(Global)’s account.
And, to improve security, I recommend to set an external ID.
Setup SORACOM Funk
Finally, Setup the SORACOM Funk in SORACOM user console.
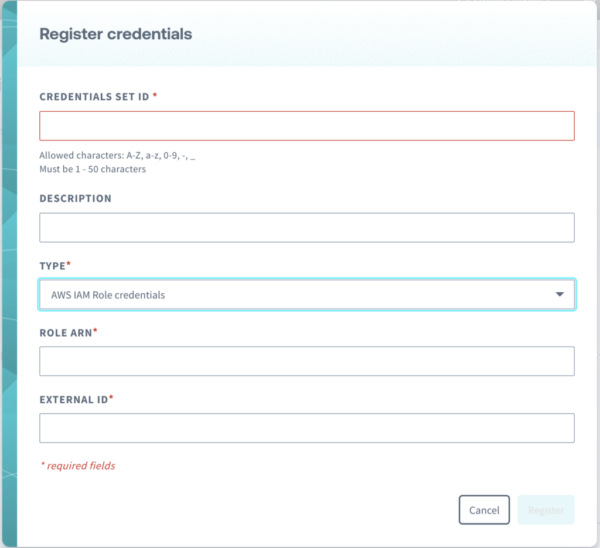
Create credential in security settings.
- CREDENTIAL SET ID
Name of This credential. - Type : AWS IAM Role credentials
- ROLE ARN
ARN of the created IAM role - EXTERNAL ID
Specified when creating the IAM role
Next,Create SIM group.
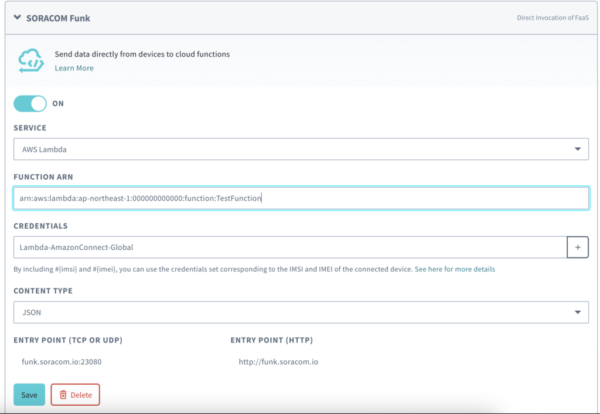
In this group, Enable SORACOM Funk settings and input as below.
- SERVICE : AWS Lambda
- FUNCTION ARN
ARN of the created Lambda function. - CREDENTIALS
Select credentials created above - CONTENT TYPE
JSON (Default)
The settings have now been completed.
Press the button to test it.
Summary
When developing using IoT Buttons, you can call cloud processing such as executing Lambda functions by pressing the button.
I think it’s useful as a way to quickly realize your needs and ideas.
And, Serverless architecture has low running costs.
I feel that development using IoT buttons will expand dreams.
Would you like to develop using IoT buttons too?
Thanks,




コメント